Subject: VDC System Filter Clogged
Noncompliance with FMVSS No. 126, “Electronic Stability Control Systems”
NONCOMPLIANCE
The brake fluid used during the production of the potentially affected vehicles may have contained excess moisture. Excess moisture in brake fluid may cause a gelatinous material to form in the brake system. This material may accumulate and temporarily clog stability control-related valve filter(s) in the Vehicle Dynamics Control (VDC) system. In this situation, VDC performance may not fully comply with the FMVSS No.126 requirement. However, the brakes will continue to operate normally
SAFETY RISK
If a stability control-related valve filter becomes temporarily clogged as described above, the system might exhibit reduced yaw rate control. In certain situations, when the VDC system is activated, it may not be as effective in preventing loss of vehicle control, which may increase the risk of a crash.
THE REMEDY
Retailers will perform an ABS sequence control (activation), then flush and replace the brake fluid in all potentially affected vehicles.
VEHICLES
Not all vehicles in the VIN ranges listed below are affected by this campaign. Coverage for all affected vehicles must be confirmed by using the Vehicle Coverage Inquiry function on subarunet.com. This data will be available in the system before owner notification begins.
CAUTION: VEHICLE SERVICING PERFORMED BY UNTRAINED PERSONS SUBARU OF AMERICA, INC. IS “ISO
COULD RESULT IN SERIOUS INJURY TO THOSE PERSONS OR TO OTHERS. 14001 COMPLIANT”
Subaru Service Bulletins are intended for use by professional technicians ONLY.They The international standard for excellence are written to inform those technicians of conditions that may occur in some vehicles, or in Environmental Management Systems. to provide information that could assist in the proper servicing of the vehicle. Properly Please recycle or dispose of automotive trained technicians have the equipment, tools, safety instructions, and know-how to products in a manner that is friendly to our do the job correctly and safely. If a condition is described, DO NOT assume that this environment and in accordance with all Service Bulletin applies to your vehicle, or that your vehicle will have that condition. local, state and federal laws and regulations.
OWNER NOTIFICATION
Subaru will notify all potentially affected vehicle owners by first class mail. This is expected to occur in May. Retailers will be advised when owner notification begins. A copy of the Owner Notification Letter is included at the end of this bulletin.
VIN LISTS
Each Subaru retailer will receive an affected VIN list from their Zone Office when owner notification begins. Vehicles will be assigned to retailers in the affected VIN list as follows:
* Original vehicle owners are assigned to the original selling retailer when their current address is within a 100-mile radius of that retailer.
* If the original selling retailer is inactive, the VIN has been assigned to the nearest ac- tive retailer.
* For any new owners or when original owners live more than 100 miles from the origi- nal selling retailer, the VIN has been assigned to the nearest active retailer.
Important: Retailer affected VIN lists include owner name and address information for ve- hicles affected by this recall. This information will enable retailers to follow up with owners of potentially affected vehicles. The lists contain owners’ names and addresses obtained from State Motor Vehicle Registration Records. The use of such motor vehicle registration data for any other purpose is unlawful. Accordingly, retailers are required to limit the use of these lists for the purpose of completion of this recall.
RETAILER PROGRAM RESPONSIBILITY
Any vehicles listed in a recall/campaign that are in retailer stock must be:
* Immediately identified.
* Tagged or otherwise marked to prevent their delivery or use prior to inspection and/or repair.
* Repaired in accordance with the repair procedures outlined in this Product Campaign Bulletin.
Retailers are to promptly perform the applicable service procedures to correct all affected vehicles in their inventory (used, demo & SSLP). Additionally, whenever a vehicle subject to this recall is taken into retailer inventory, or in for service, necessary steps should be taken to ensure the recall correction has been made before selling or releasing the vehicle.
PARTS INFORMATION
This repair requires brake fluid, which is available through the “Genuine Subaru Automotive Chemicals” program. No other parts are required for this repair.
For parts ordering purposes, retailers should use the part number listed below. Each case contains 24 bottles.

For claim reimbursement purposes, retailers should use the part number listed below which represents one 12-ounce bottle. Up to three 12 ounce

PROCEDURE:
will consist of 4 basic steps:
Step 1: Perform the Sequence Control
Step 2: Flush and bleed the brake system
Step 3: Perform the Sequence Control
Step 4: Perform a final bleeding of the brake system
IMPORTANT:
Never let brake fluid come into contact with the painted surface of the vehicle body. If a spill occurs, wash away with water immediately and wipe dry.
Step 1: Perform the Sequence Control
If any ABS / VDC DTC(s) are stored, the sequence control function will not operate.
You can do it with Subaru Select Monitor Subaru SSM III or SSM 4.
Attach both instructions
Done with Subaru SSM 3:
Connect the Subaru Select Monitor to the vehicle’s data link connector.
Turn the ignition switch to ON.
In SSM 3 Main Menu:
select All other models – Each System Check – Brake Control System – ABS/VDC System
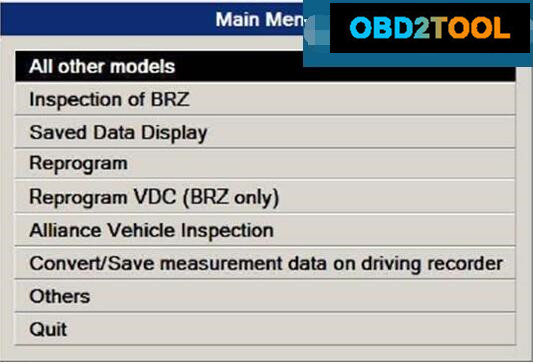
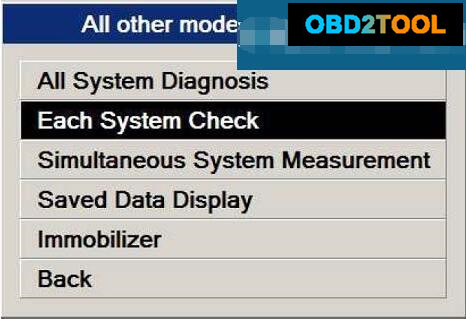
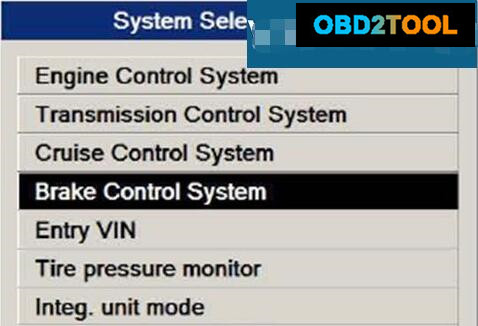
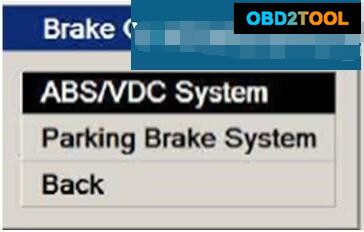
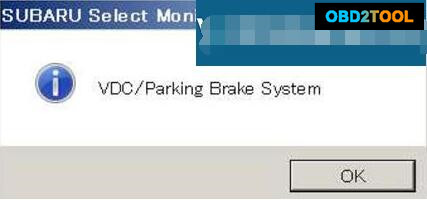
Select OK when you see the VDC / Parking Brake System
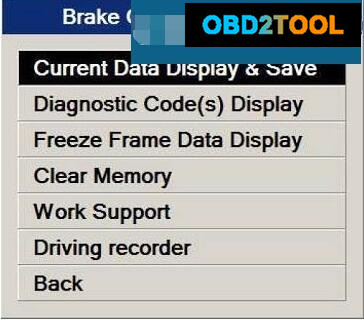
Select Current Data Display & Save
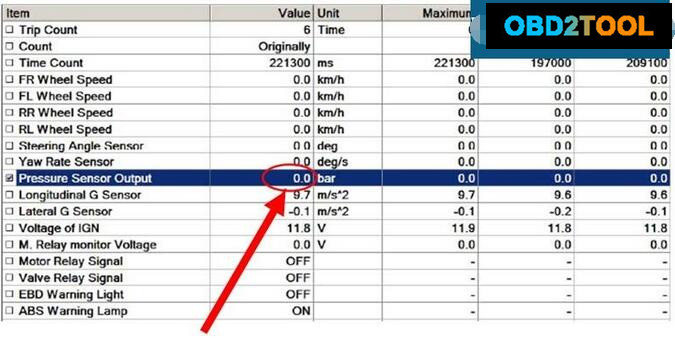
Depress the brake pedal while monitoring the Pressure Sensor Output until a mini- mum 100 bar is shown. Use a brake pedal pressure gauge or a tape measure to record a “value” for the length of the pedal stroke required to achieve 100 bar as displayed in the Current Data screen. This value must be duplicated when performing the Se- quence Control.
Select Work Support – Function Check Sequence – ABS Sequence Control Mode
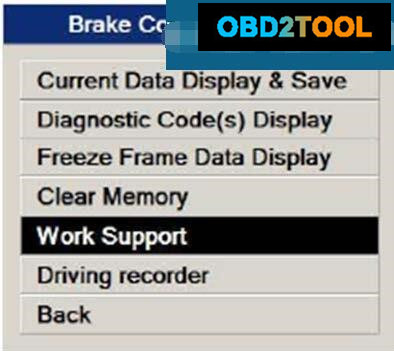
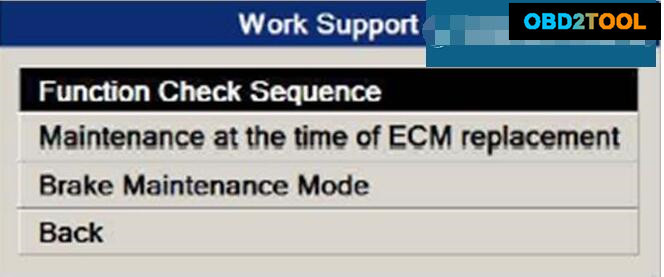
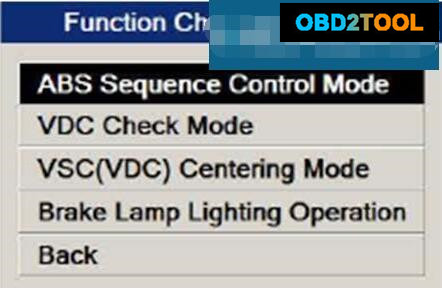
Press the brake pedal firmly to the value established (approximately 100 bar) and the Sequence Control will start. Keep the brake pedal depressed until the check is com- plete. Releasing the brake pedal while the Sequence Control is part way through will result in an incorrect check.
Done with SSM 4 (VXDIAG Subaru Scanner don’t support SSM4):
Connect the Subaru Select Monitor to the vehicle’s data link connector.
Turn the ignition switch to ON.
In the SSM 4 software, select Each System – Brake Control

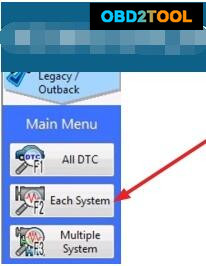
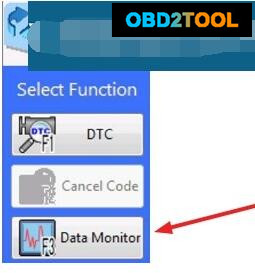
Select Data Monitor
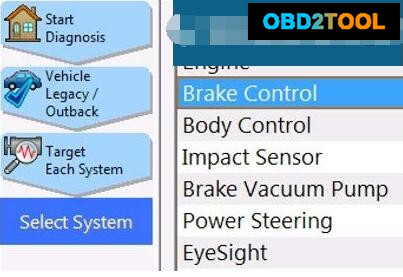
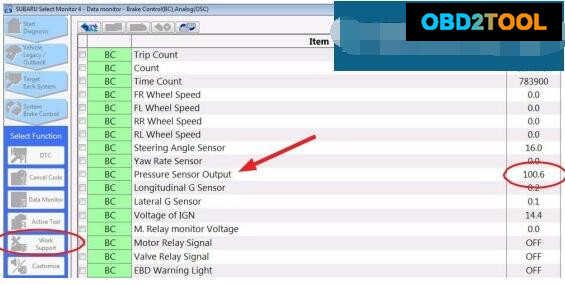
With the Data Monitor screen displayed, depress the brake pedal while monitoring the Pressure Sensor Output until a minimum 100bar is shown. Use a brake pedal pres- sure gauge or a tape measure to record a “value” for the length of the pedal stroke re-quired to achieve 100 bar as displayed in the Data Monitor screen shown below. This value must be duplicated when performing the Sequence Control. Once the value is established, select Work Support.
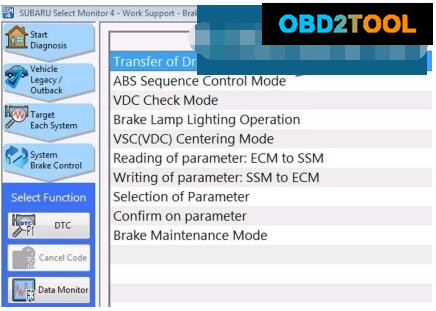
Select ABS Sequence Control Mode in the Work Support item list
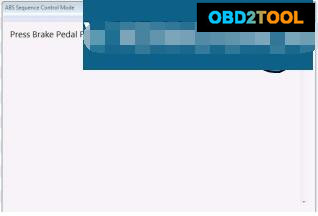
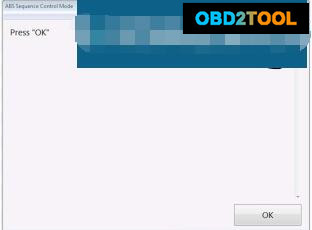
The following screens will display in order:
Press the brake pedal firmly to the value established (approximately 100 bar), press OK and the Sequence Control will start. Keep the brake pedal depressed until the check is complete. Releasing the brake pedal before the Sequence Control is finished will result in an incorrect check
Note: there are lots of Subaru diagnostic tools in the markets.
For ABS Sequence Control, you can choose original Subaru SSM 3 scanner or cheap VXDIAG Subaru diagnostic tool. Both are confirmed to work good with Subaru diagnosis and programming.
Step 2: Flush then bleed the brake system
NOTE: There are several methods of bleeding the brakes including manual bleeding, vacuum bleeding, and pressure bleeding. Each method has its own advantages and disadvantages. To support these methods, a wide variety of brake bleeding equipment exists in the automotive industry. If a specialty tool is to be utilized, always consult the manufacturer’s specifica- tions and guidelines before attempting to bleed the brakes. Currently, the Service Manual supports the manual bleeding method.
REMINDERS:
Never reuse drained brake fluid.
Do not allow dirt or dust to get into the Master Cylinder reservoir.
For convenience and safety, perform the procedure with a helper.
VERY IMPORTANT: Always keep the Master Cylinder reservoir filled with brake fluid at the MIN level marked on the reservoir or higher to prevent entry of air.
In this step, numbers 1, 2, 3 and 4 outline the “flushing” procedure.
Numbers 5, 6, 7 and 8 outline the “bleeding” procedure.
Confirm the Master Cylinder reservoir is filled with brake fluid.
Attach one end of a transparent vinyl tube to the Right Front caliper bleed screw, and the other end to a brake fluid collection container as shown in the illustration below.
Starting with the Right Front, loosen the caliper bleed screw, and repeatedly press
VERY IMPORTANT: Flush and bleed the brake system (calipers) in the following sequence: RF → LF → LR → RR. Failure to perform bleeding in this sequence can result in air remaining trapped in the system resulting in a low or “soft” brake pedal.
the brake pedal slowly over the full range of travel until no air bubbles and fresh brake fluid is seen in the transparent vinyl tube. Tighten the caliper bleed screw and add fluid to the reservoir as it is depleted. Never let the fluid level fall below the minimum level (MIN) marked on the reservoir.
NOTE: Air bubbles should be removed after repeating the depressing operation approximately 15 times or more for the front calipers, and 20 times or more for the rear calipers.
Perform the steps above (2 and 3) on each brake caliper: RF → LF → LR →
Tighten the bleed screw and repeat full stroke depressing of the brake pedal 5 to 6 times, then depress and hold the brake pedal.
Loosen the bleed screw to drain the brake fluid. When the brake pedal reaches the full stroke position (floor), immediately tighten the bleed screw and release the brake pedal. Never let the fluid level fall below the minimum level (MIN) marked on the
Repeat until there are no more air bubbles and fresh brake fluid is seen in the transparent vinyl tube.
Perform the steps above (5, 6 and 7) on each brake caliper: RF → LF → LR →RR.
Step 3: Perform the Sequence Control (Step 1) again
Step 4: Bleed the system a final time (5 – 8 above) to complete the procedure.
CLAIM REIMBURSEMENT AND ENTRY PROCEDURES
Credit to perform this service campaign will be based on the submission of properly completed repair order information. Retailers may submit claims through Vehicle Claim Entry on subarunet.com.
Labor Description Labor Operation # Failure Code Labor Time Claim Type
2015MY LEGACY / OUTBACK BRAKE FLUSH / BLEED PROCEDURE A153-310 WTC-64 0.8 RC
NOTE: Up to 3 (three) 12 oz. bottles of SOA635004 brake fluid can be claimed for this procedure.
IMPORTANT REMINDERS:
SOA strongly discourages the printing and/or local storage of service information as previously released information and electronic publications may be updated at any time.
Always check for any open recalls or campaigns anytime a vehicle is in for servicing.
Always refer to STIS for the latest service information before performing any repairs.

Leave a Reply