When Autel MaxiDAS DS808 function is selected, the screen displays the
data list for the selected module. The items available
for any control module vary from one vehicle to another.
The parameters display in the order that they are
transmitted by the ECM, so expect variation between
vehicles.
Gesture scrolling allows you to quickly move through the
data list. Simply swipe the screen up or down to locate
the data you want. The Autel MaxiDAS DS808 figure below shows a typical Live
Data screen:
Display Mode
There are 4 types of display modes available for data
viewing, allowing you to view various types of
parameters in the most suitable way.
Tapping the drop-down button on the right side of the
parameter name opens a submenu. There are 4 buttons to
configure the data display mode, and one Help button on
the right that you can tap for additional information.
Each parameter item displays the selected mode
independently.
1) Analog Gauge Mode – displays the parameters in form
of an analog meter graph.
2) Text Mode – this is the default mode which displays
the parameters in texts and shows in list format.
3) Waveform Graph Mode – displays the parameters in
waveform graphs. When this mode is applied, three
control buttons will appear on the right side of the
parameter item, allowing you to manipulate the display
status.
4) Digital Gauge Mode – displays the parameters in form
of a digital gauge graph.
Full Screen Display – this option is only available in
the waveform graph mode and mostly used in Graph Merge
status for data comparison.
There are three control buttons available on the top
right side of the screen under this mode.
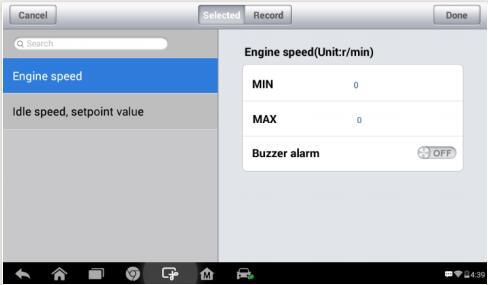
How to edit the waveform color and line thickness in a
data graph
Select 1 to 3 parameter items to display in Waveform
Graph mode.
Tap the Zoom-in Button on the right to display the
data graph in full screen.
Select a parameter item on the left column.
Select a desired sample color from the middle
column.
Select a desired sample line thickness from the
right column.
Repeat step 3-5 to edit the waveform for each
parameter item.
Tap Done to save the setting and exit, or tap Cancel
to exit without saving on www.youobd2.com .
Setting Mode in Live Data
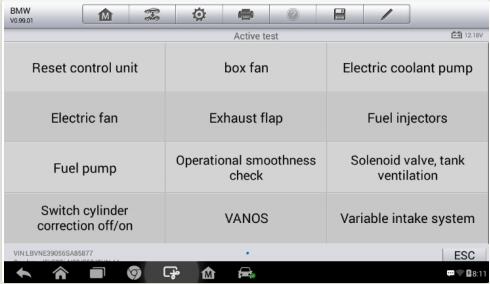
Active Test
The Autel Scanner DS808 Test function is used to access vehicle-
specific subsystem and component tests. Available tests
vary depending on the manufacturer, year, and model, and
only the available tests display in the menu.
During an active test, the tester outputs commands to
the ECU in order to drive the actuators. This test
determines the integrity of the system or parts by
reading the engine ECU data, or by monitoring the
operation of the actuators, such as switching a
solenoid, relay, or switch between two operating states.
Selecting Active Test opens a menu of test options that
varies by make and model. Selecting a menu option
activates the test. Follow on-screen instructions while
performing tests. The content and pattern of the on-
screen information vary according to the type of test
being performed. Some toggle and variable control tests
display Active Test Controls at the top of the screen
with data stream information below, or vice versa.
The functional buttons at the lower right corner of the
Active Test screen manipulate the test signals. The
operational instructions are displayed on the main
section of the test screen. Simply follow the on-screen
instructions and make appropriate selections to complete
the tests. Each time when an operation is successfully
executed, message such as “Command Finished”,
“Activation Successful”, or something similar
displays.
Tap the ESC functional button to exit the test when
finished.
Special Functions
These functions perform various component adaptations,
allowing you to recalibrate or configure certain
components after making repairs or replacement.
The main menu displays the supported special functions
for the test vehicle.
Follow the on-screen instructions to complete the
desired function. When the operation is done, an
execution status message such as Completed, Finished or
Successful, displays. Tap the ESC button to exit the
function.
Hot Functions
The Service section is specially designed to provide you
with quick access to the vehicle systems for various
scheduled service and maintenance performances. The
typical service operation screen is a series of menu
driven executive commands. By following the on-screen
instructions to select appropriate execution options,
enter correct values or data, and perform necessary
actions, the system will guide you through the complete
performance for various service operations.


Leave a Reply