")
Problem:
How to restore BMW ICOM A2 after a factory reset? LAN doesn’t work after reset.
Answer:
You need to restore it with usb drive, here is the file you need and how to do it…… first restore then update …. you should search what is the last version of ista that support F
1.
https://mega.nz/file/tBYzVSBY#imbaH6NeLbV7n7dutVb3BMXYMGLVw0Ear-HqTXUUZTs
icom_01_37_00 .rar
23.2 MB
2. Update firmware BMW ICOM A1-A2-A3 (The next paragraph will list the details)
3. BMW ICOM A1-A2-A3 Factory Restore (The last paragraph will list the details)
Step-by-step procedure on BMW ICOM A1-A2-A3 Factory Restore
Perform a factory reset if you face one of the following issues:
-Single ICOM with at least one green LED, but does not become visible in ISTA
- Single ICOM with at least one green LED, but it is not available in Connection Manager and therefore cannot be reserved
- Single ICOM is not working in WLAN
-Single ICOM with at least one green LED, but Firmware Update is not possible neither via ISTA nor via ICOM Web GUI
Prerequisites:
-USB flash drive. 2.0 with a minimum of 60 MB free space formatted with FAT32 (e.g. by Microsoft Windows)
- “ICOM_Restore.bin” file, which can be downloaded from this page. Make sure you always use the latest file for the factory reset
Fix: Perform the following steps:
1. Copy the “ICOM_Restore.bin” file to the USB flash drive
2. Disconnect the network cable from ICOM A
3. If ICOM A is placed in an OBD II jack of the vehicle, then pull it out (ICOM A must have status off”)
4. Connect the USB flash drive to ICOM A
5. This step has to be done in a maximum time of 5 sec or the update process will not start:
Press the reset button on the ICOM A and hold it pressed:

Connect ICOM A to the OBD II jack while the button is pressed (all LED will become red)
Release the reset button and then press it 3 times
The LEDs will flash red (if not, repeat the above steps)
The process is finished after 3 minutes
When the system LED is shining green, the update process is finished successfully
Disconnect to USB flash drive
6. Factory reset is done
7. Disconnect the ICOM A
8. Connect the LAN cable between the ICOM A and the network
9. Connect the ICOM A to a vehicle or external power supply
10. ICOM becomes visible now again in ISTA / work correctly again
Step-by-step procedure on BMW ICOM Upgrade:
1. First step is to make sure the LAN adapter is set to DHCP and is enabled, here is how to do
it:
* Open Network Connections by clicking the Start button, and then clicking Control Panel. In the search box, type adapter, and then, under Network and Sharing Center, click View network connections.
* Right-click the connection that you want to change, and then click Properties. If you’re prompted for an administrator password or confirmation, type the password or provide confirmation.
* Click the Networking tab. Under This connection uses the following items, click either Internet Protocol Version 4 (TCP/IPv4) or Internet Protocol Version 6 (TCP/IPv6), and then click Properties.
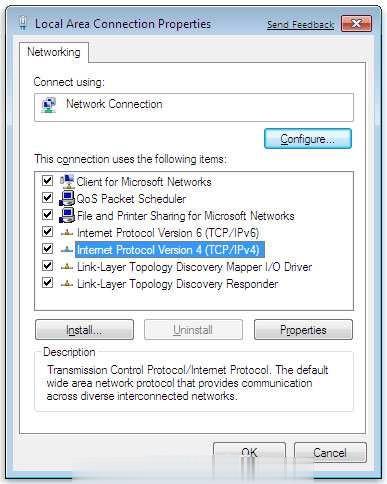
The Network Connection Properties dialog box
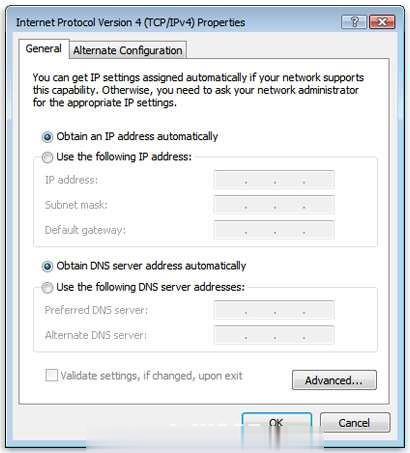
* To get IP settings automatically using DHCP, click Obtain an IP address automatically,and then click OK.
* To get a DNS server address automatically using DHCP, click Obtain DNS server address automatically, and then click OK.
* Connect ICOM to the car and to the UTP cable provided in the package
– there should be 4 green leds powered on
* Check that the network adapter has an IP like 169.254….
* Using the web browser go to http://169.254.92.38:60080
User: root Password: NZY1150263
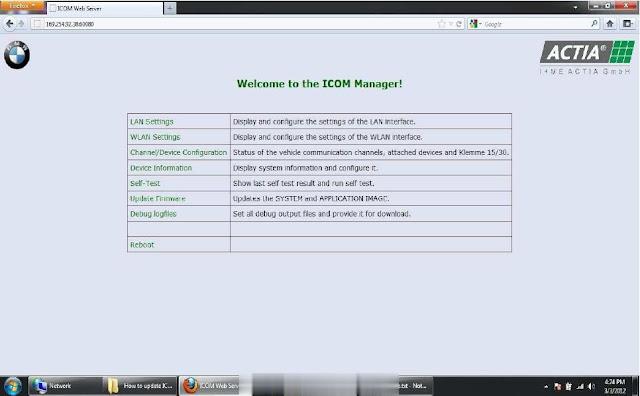
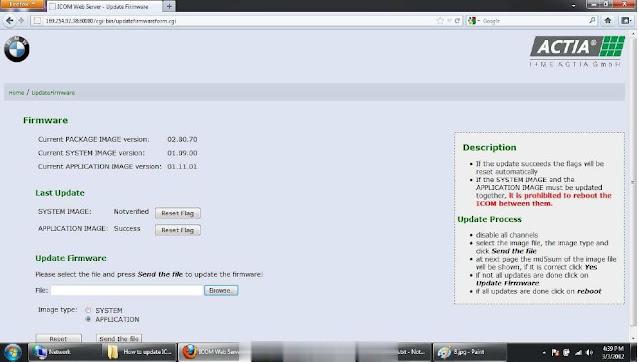
* Select channels menu and click only once on the button available there:
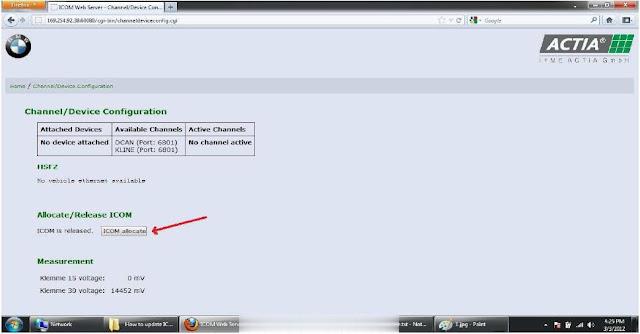
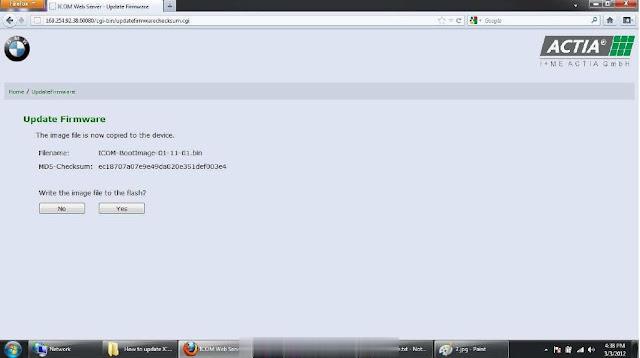
* Go to firmware update and update with ICOM-BootImage-01-11-01.bin, then with ICOMApplicationImage-
01-15-01.bin, don’t reboot between parts:
– at the image type we have selected System, now Browse for the ICOM-BootImage-01-11-01.bin and
click on “Send the file” button and wait

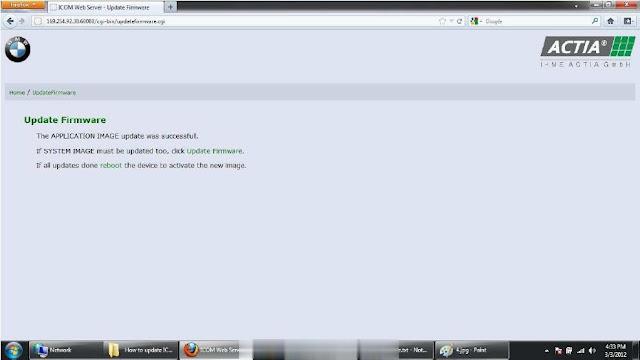
– click on Yes and wait
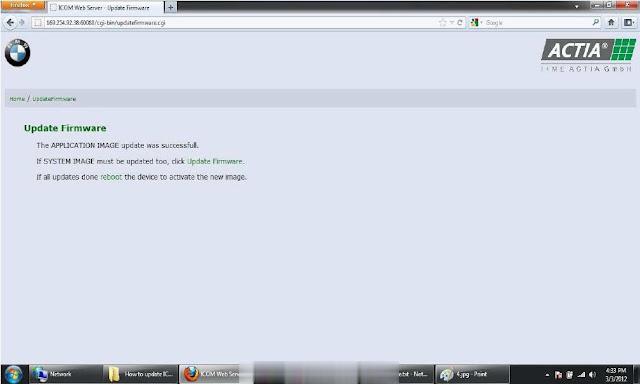
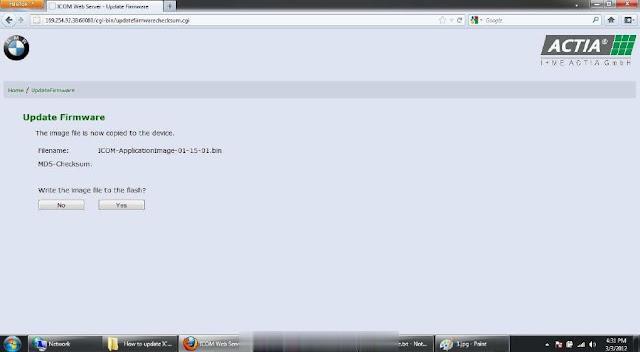
-now click on Update Firmware to go and update with ICOM-ApplicationImage-01-15-01.bin
– at Image type check the option called APPLICATION and Browse for ICOM-ApplicationImage-01-15-
01.bin and click on “Send the file” button and wait
– click on Yes and wait
* Reboot ICOM
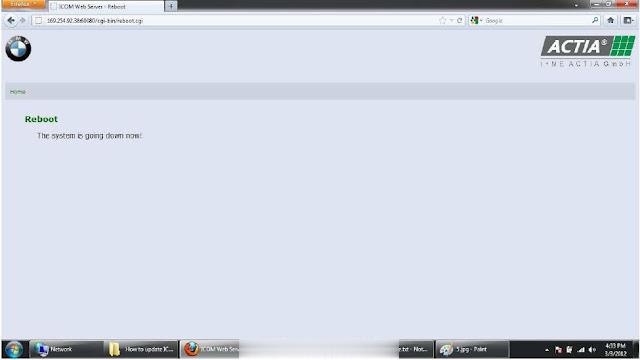
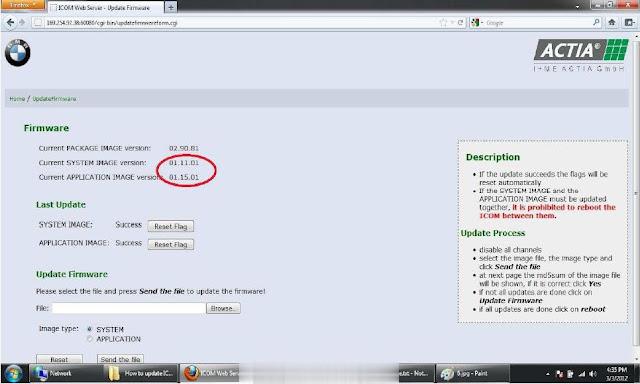
* After at least 2 minutes press on Home button and go to Update Firmware and check to see
the firmware versions for boot is 1.11.01 and application is 1.15.01:
Alright, hope it helps!
Leave a Reply